Migrate Complete Managed WordPress Site From Godaddy To Another Host | Easy Guide
This Tutorial is a complete and simple guide to migrate complete managed wordpress site. Before starting this tutorial for you, let me clear one thing, you do not need to be a developer or technical person to migrate your website from Godaddy, Bluehost or any other host to new host and vice versa. Hosting companies charge extra money to move your site but this simple step-by step guide will allow you to move your website completely including plugins, settings, content and every single thing from one host to another.
I WILL MAKE IT AS SIMPLE AS POSSIBLE FOR YOU
Difference between Godaddy and other Hosts
There is one unique difference between Godaddy managed wordpress and other hosting companies, Godaddy do not provide cpanel access in their wordpress managed hosting service and there are many restrictions in making changes in the files and directories. This creates nightmare for many web owners to do easily what they want. Some people consider it a disaster when it comes to migrating a wordpress managed site from Godaddy to some other host.
But This Guide Will Turn This Nightmare Into a Sweet Dream
STEP 1:
Updates:
First of all you must update the version of the wordpress you are using in your Godaddy hosting, any plugins you need to carry on with them should also be updated, any theme updates as well, if everything is already updated then move on. Once you have updated your currently running website now the time is to take complete backup.
STEP: 2
Backup:
To take backup from Godaddy managed hosting you need to access the files of your wordpress installation using FileZilla, its pretty simple, here is how you do it
- Go to your Godaddy managed wordpress hosting and view your SFTP credential

You will have the following information in you SFTP details

- Open and start FileZilla
Now enter the SFTP credentials into FileZilla and click quick connect
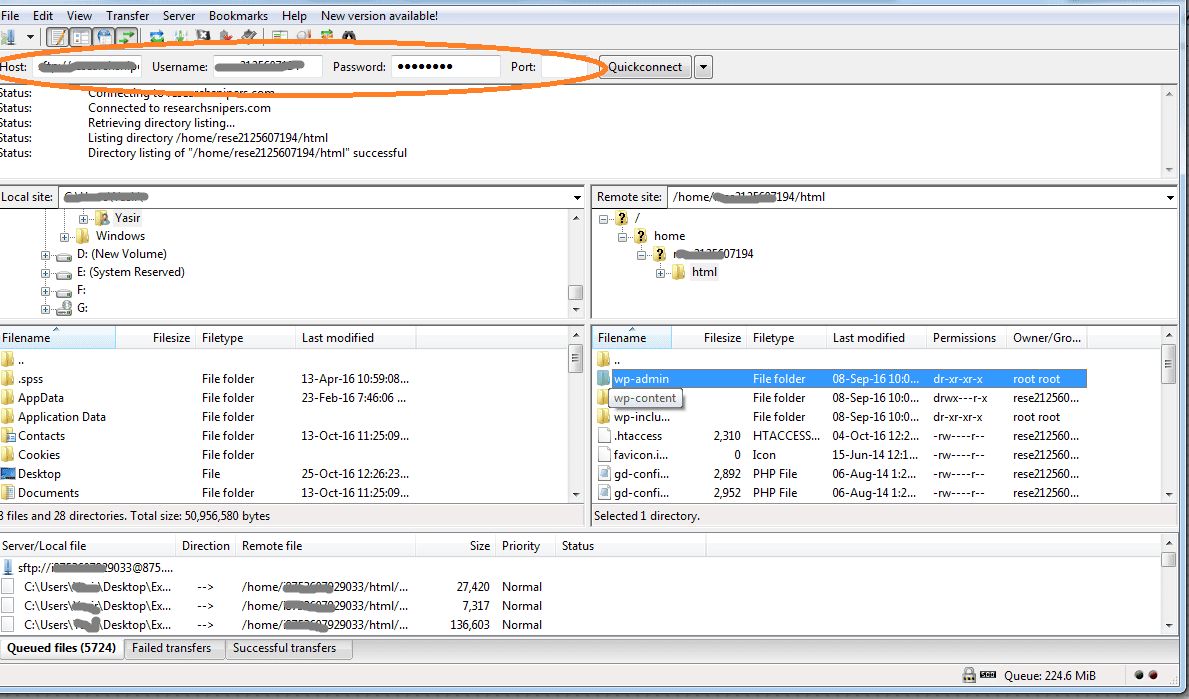
Once you are connected, it will list the directories and files in the right column as you can see in the image above. The files should contain all wordpress files that are in the hosting account.
- Download Files
Now you have to select all the files by clicking on the folder and pressing CTRL+A, right click the selected files and click download.

It will start queuing the files and folders and start downloading the files in zip format. This process will take some time to download, depending on the size of your website. You can also define the folder destination of the downloaded files in the left column before clicking download. This process will do complete backup download of your wordpress files as they are installed in your current hosting.
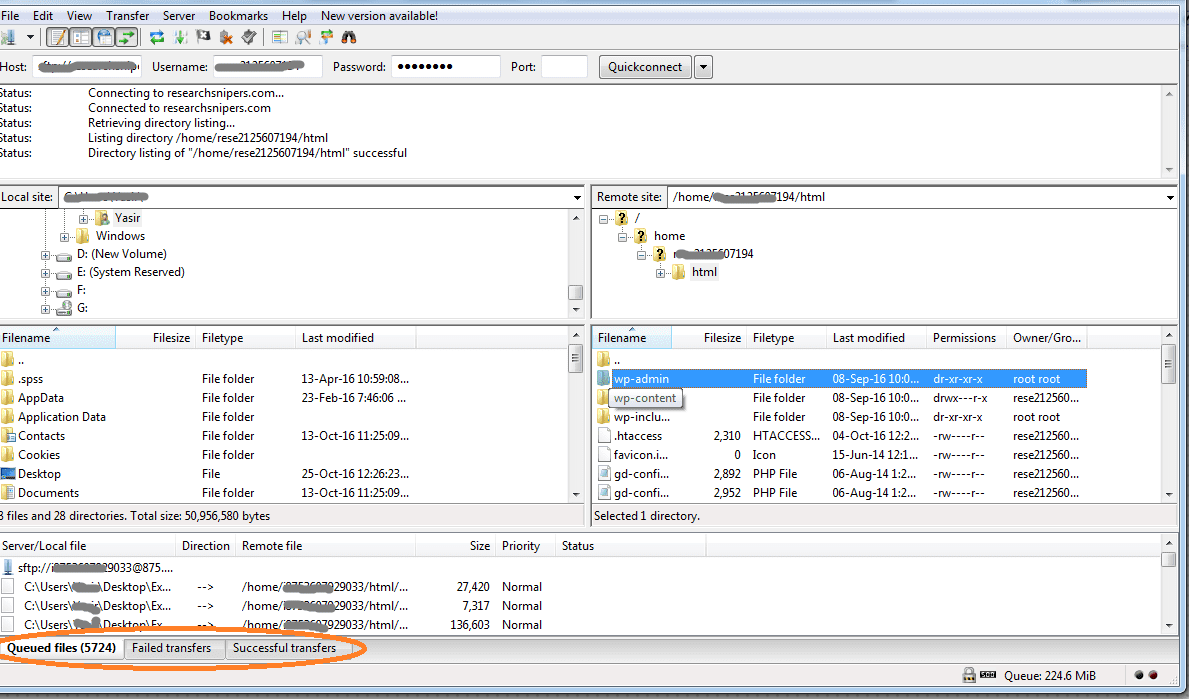
- Keep an eye on transfers
This part is important to keep an eye on queued files, successful transfers and failed transfers, if there are any failed transfers in the list. Then after the process is finished, click on the failed transfers tab, select all failed transfers and add to queue/transfer them again. Once you have all the files transferred you have a complete backup of your wordpress files. Keep the Zip Folder save on your computer its your wordpress complete backup.
Up to here one part is done successfully, another part is the database
STEP 3:
The next step is to download your mysql database. To do this you will login to phpMyadmin panel from your Godaddy hosting account.
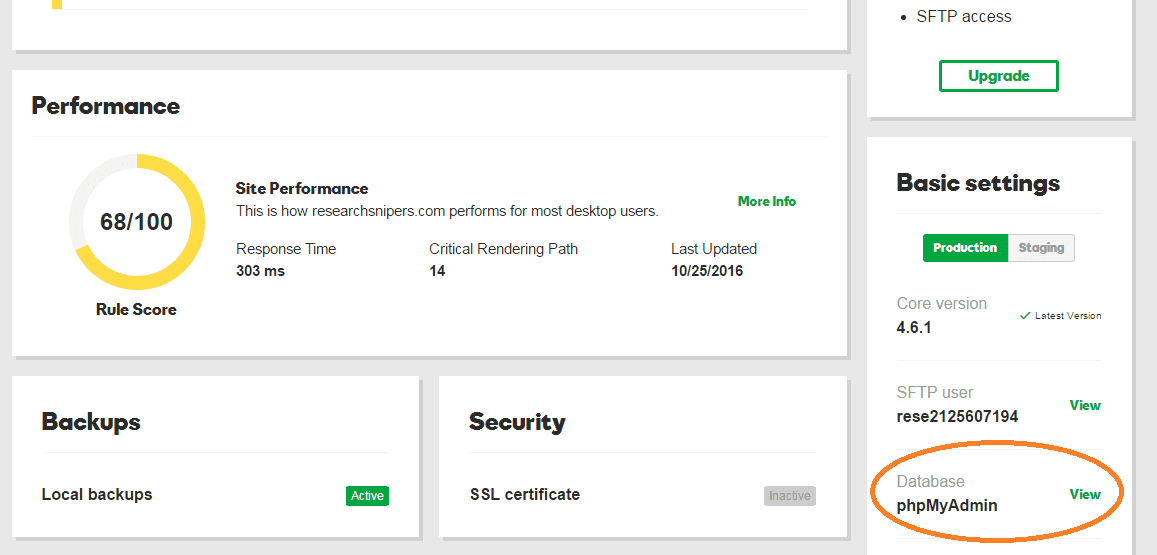
When you will view the credentials in phpMyAdmin, go to phpMyAdmin url and login.
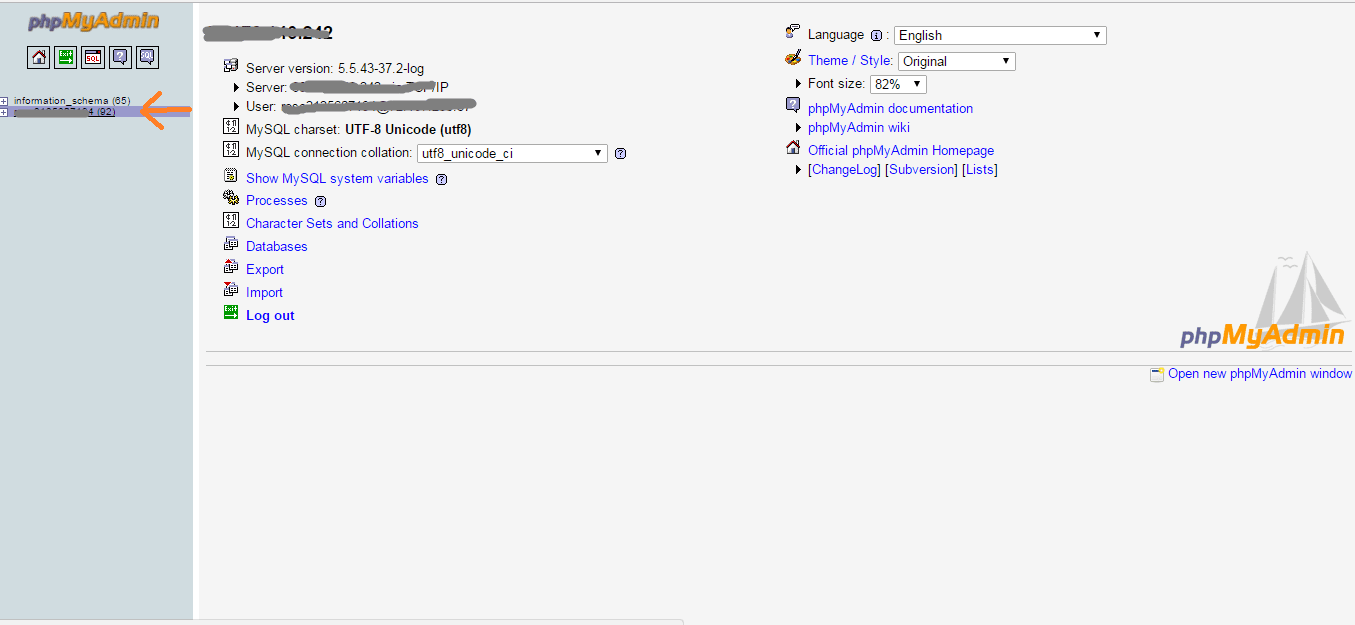
Once you logged in you will see your database on the left corner, click on this database to open up the tables.
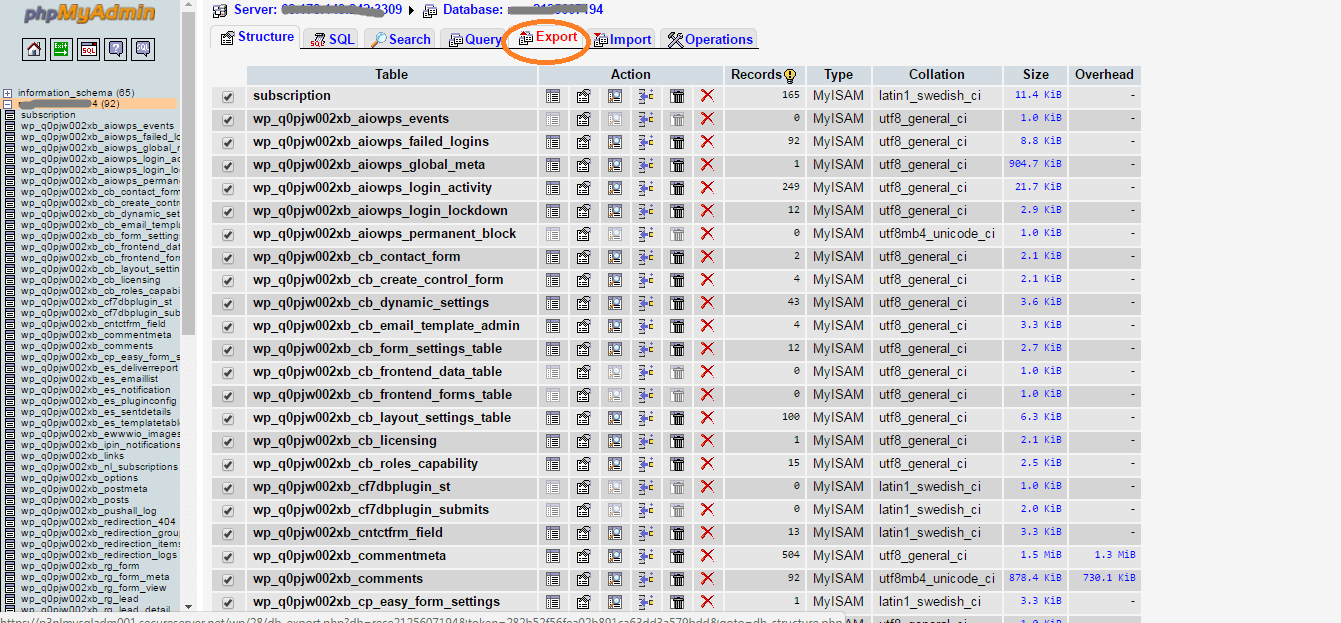
When all the database and tables are listed, click check all from the left bottom. And then click export from the top bar as shown in the image above.
After that you just have to give a name to your downloaded database and click go.

This is your database export save it on your computer. This process will not take much time to complete as compared to files download.
Once you have completed this process now you have your entire site backed up on your computer.
STEP-4
Install a new wordpress site in your new hosting:
In this phase you will do a fresh wordpress install in the new hosting account. Either you are doing this install on a new domain or you are pointing the older domain to the new host. If you are pointing older domain to the new host, you just need to change the name servers provided by your new host into the domain settings. I hope you will do that easily, once the domain has started pointing your new host, you can install a fresh wordpress on your domain.
STEP-5
Login to Cpanel:
When you have installed a fresh wordpress into your hosting, now you will login to that Cpanel and go to file manager.
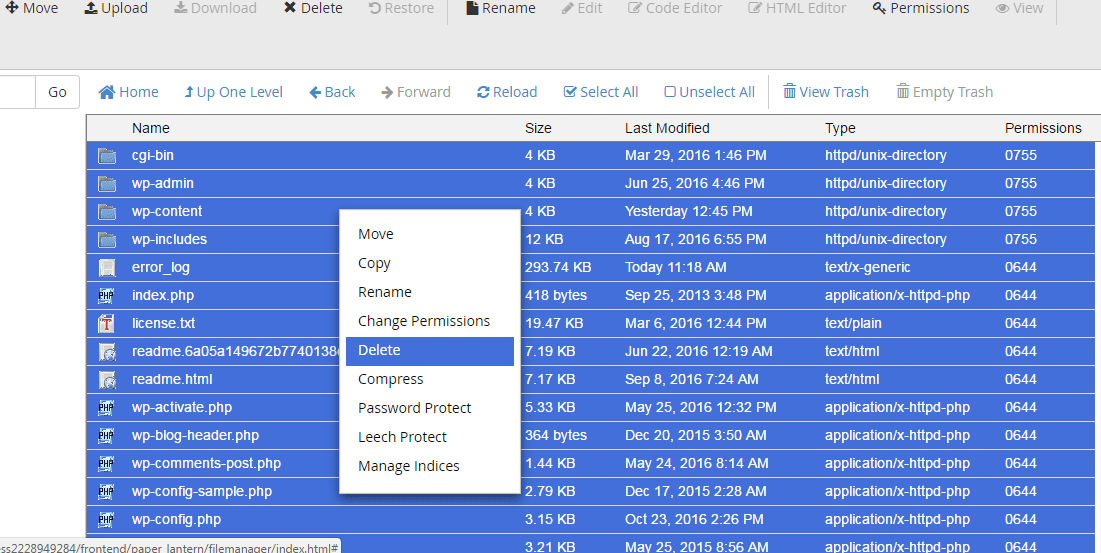
You will see where your wordpress is installed in this hosting account, it should be normally in public_html, you might have a different setup and installed it in some directory. Whatever the case is go the directory where all the wordpress files are listed as shown in the image below;

The next thing you need to do is to keep the settings of wp-config.php file saved somewhere. You can do that in two ways; either right click and download wp-config.php file and save on your computer or after right clicking click edit to see the details as shown in the image below;
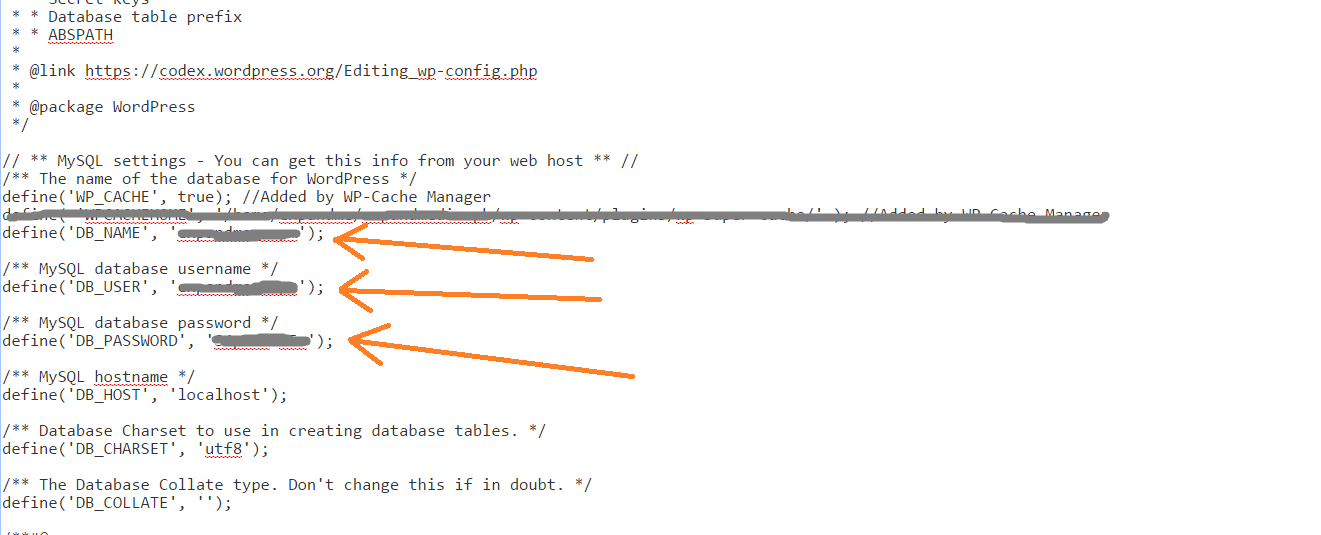
In this file you will copy and paste the DB_NAME, DB_USER, DB_PASSWORD in a notepad and save them. Because you will use these things later. Copy the three grayed credentials excluding the inverted commas.
STEP-6
Delete all wordpress files and upload new files:
After you have saved wp-config.php file settings now you will deleted all the files of this wordpress install and upload the ones you have downloaded from Godaddy hosting.
Once you have deleted the files the folder would be empty, now click on upload and select your zipped file which you have download from Godaddy account using FileZilla. This process will take some time to upload.
Once the zip folder is uploaded you will extract it in the same directory.
STEP-7
Replace the wp-config.php file settings:
Once you have extracted files, you will see the wp-config.php in the list, this wp-config.php file has to be edited. Now replace the DB_NAME, DB_USER, DB_PASSWORD of this file with the previous one that you either downloaded or saved the details. Remember only to replace the information which is within the inverted commas ‘ ‘ because commas are not included in it. After replacing credentials save changes.
Read more: How to fix WordPress admin panel dead slow, connection error
STEP-8
Replace Database tables from phpMyAdmin panel:
This is the final step in the process and it is quite simple, In your new hosting login to your phpMyAmin panel and click on the database. Once the database is listed with the tables you just have to check all from the bottom and click on drop.
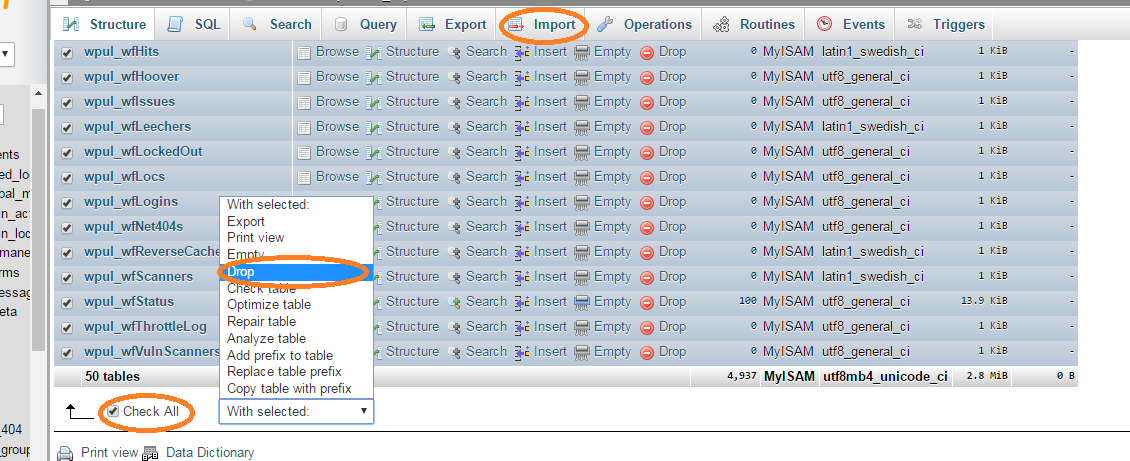
When you will click on drop, the database will be empty. Now you have to click on import and select the file which you have saved from Godaddy database to import. When it is imported successfully you are done…….
Now You Have A Site Up Running Exactly The Clone Of Your Site Which Was Running On Godaddy.
Must Read: How to increase speed of wordpress site
Digital marketing enthusiast and industry professional in Digital technologies, Technology News, Mobile phones, software, gadgets with vast experience in the tech industry, I have a keen interest in technology, News breaking.


Hi, I’m going through this now – seems to be exactly what I need! But in the Filezilla download step there’s a useful bit of info missing – when I selected the files the download option was greyed out. You have to select a ‘local site’ destination to download the files to. Not obvious to me!
Thanks For Pointing out Andrew, please let me know if you managed to download or not, normally you will be able to download by selecting all files>right click>download.
Yes it was really just that I hadn’t set a destination. I found a guy on a forum with the same problem.
I’m on step 3 now – the first time I didn’t click ‘save as file’ and god knows what it was doing for the last 20 mins.
Honestly I wouldn’t have even attempted this if I hadn’t found this guide, so thanks again!
No worries Andrew, I am glad that you found the solution
Yasir, I did it! But I had one final problem that had me tearing my hair out. In your step 5, editing the wp-config, I followed your instructions.
But the SQL hostname was a long string of digits and I had to change that to ‘localhost’ – presumably a lot of other Godaddy customers will have to make the same change.
One final thanks from me, and hopefully your guide will continue to help people making this change.
Yes, the name localhost is your default new host name, Godaddy have a different one. Thanks for sharing this.